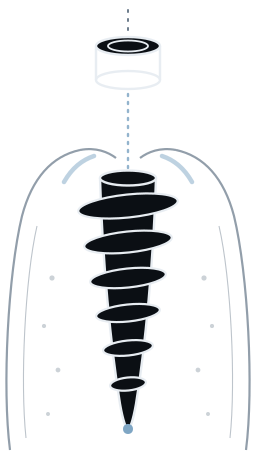
Every guide type. One planning standard.
Every template we produce is built around the guided kit you already own, printed on certified medical-grade resin, and released only after you have approved the plan in writing.
Teeth-Supported Guides
The accuracy benchmark. For partially edentulous arches, the template seats on stable remaining dentition — fully guided, flapless where the tissue allows, with predictable three-point support.
Bone-Supported Guides
For the fully edentulous arch, or where remaining teeth cannot carry the guide. Designed against the reflected bone surface from your DICOM data, with fixation pin channels planned around vital structures.
Stackable Guides — All-on-X
The complete stacked protocol: base and pin guide, bone reduction, implant placement guide, prosthetic index, and a PMMA temporary designed from the same plan. One registration, carried through the whole surgery.
Endodontic Guides
Guided access for calcified or sclerosed canals, and for apicoectomy. A drill path planned against your CBCT so the access cavity stays minimal and the tooth keeps its structure.
Bone Reduction Guides
An alveolectomy guide that takes the ridge to exactly the level your prosthetic plan requires — enough restorative space for the transition line, without freehand judgement or a second reduction.
Crown Lengthening & Preparation
Gingivectomy and osseous crown-lengthening templates driven by the planned smile design, plus tooth-preparation guides that keep reduction inside the restorative envelope.
The face first, then the implants, then the provisional.
Stackable All-on-X is the one protocol where planning the implants first is the wrong order. We start from the smile, in Smilecloud, and everything downstream is derived from that design rather than fitted to it afterwards.
Facially driven design
The new smile is designed in Smilecloud against the patient’s own face and photographs — midline, incisal plane, lip dynamics and tooth display — before a single implant position is considered.
Smilecloud
The patient can see it
The design comes back as a photorealistic before-and-after. That is worth as much chairside as it is clinically: consent for a full-arch case is far easier to obtain when the patient has already seen the result.
Case acceptance
Implants placed to serve it
Only now are the implant positions planned — against bone volume, sinus and nerve, but answering to the prosthetic design rather than dictating it.
Prosthetically driven
The stacked set
Base and pin guide, bone reduction guide, implant placement guide and prosthetic index — one registration carried through every stage of the surgery.
One registration
The provisional, from the same file
A PMMA immediate-loading provisional milled or printed from the identical design. What you screw in on the day is the smile the patient approved, not an approximation made under time pressure.
Immediate loading
A stacked set with a provisional is several devices designed from one plan, not a single
template, and the prosthetic design needs your approval before any of it can be made. Plan
on a longer turnaround than a standard guide — we quote the date per case when we
confirm the plan, and we will tell you at the outset if your surgery date is not realistic.
Printed in KeyGuide. Sterilised by you, before every case.
Two things every clinician receiving a template from us needs to know before the guide comes out of the box — and one exact autoclave cycle.
KeyGuide by Keystone
Templates are printed in KeyPrint KeyGuide, a resin certified for medical and dental use and intended specifically for surgical guides. Never engineering or model resin. Every guide leaves us washed in isopropyl alcohol, dried and fully post-cured in a validated curing unit — that part is our job, and it is done before the guide is packed.
Supplied clean, not sterile
Sterilising the guide is the clinic’s responsibility and must be done before every procedure, without exception. KeyGuide has a manufacturer-validated steam cycle, printed below and repeated on the protocol sheet in the box. It is a single-use device: do not re-sterilise it after surgery.
Steam sterilisation — KeyGuide
Manufacturer-validated parameters. Print this page for the sterilisation room.
Clean
Remove any visible soil from the surface, paying attention to edges and hollows. Alcohol may be used to wipe the guide down.
Dry
Dry it thoroughly, especially inside the hollows and channels. Compressed air works well.
Inspect
Check for damage or cracks once dry. A cracked template is not a template — call us rather than operating on it.
Pouch
Use a sterilisation pouch to EN ISO 11607 / ANSI AAMI ST79, rated to at least 137 °C, with the seal smooth and free of wrinkles.
Load the pouches on edge. Lying flat, condensate pools on the device. On edge, it drains.
Do not exceed the temperature, and do not improvise a longer cycle. Resin distorts with heat. A template taken through a hotter or longer cycle can come out looking entirely normal while no longer matching the plan it was built from — which removes the whole benefit of guided surgery, silently.
Do not re-sterilise after surgery. KeyGuide is patient-specific and single-use; it is not designed to perform as intended after a second cycle.
Try the guide in after sterilisation and before the incision. It should seat exactly as it did on the model. If it rocks or lifts, stop and call us.
Manufacture is done in our own laboratory in Athens, certified for the production of dental prosthetic work and surgical guides to the applicable European requirements. Your case is not sent out to a third-party print bureau. Full detail in the Terms of Service.
Which guide does your case need?
If you are unsure, send the CBCT and describe the objective. We will tell you which template the anatomy and the prosthetic plan actually call for — before you commit to anything.